Viable Blog is a WordPress Blog theme designed for running personal blog or can be used to create any kind of blogging website. Below is the full documentation for Viable WordPress Blogging Theme Documentation.
Click on the screenshot if the text written at the screenshot is not readable.
Note: If you are free users, some widgets or sections may not be visible as per documentation. “Pro” is used to indicate features available on the Pro Version.
1. INTRODUCTION
Support Forum: Go Here
2. GETTING STARTED
First of all, Thank you so much for purchasing this theme and for being our loyal customer. You are awesome!
You are entitled to get lifetime support to this product + exceptional support from us directly.
2.1 THEME INSTALLATION ( THROUGH WORDPRESS DASHBOARD )
You can install the theme from the WordPress admin dashboard. This will be the first process of installing the theme on your WordPress website.
2.2 THEME INSTALLATION ( THROUGH FTP )
- Login to your file manager with FTP client with your FTP user-name & password
- Navigate to your WordPress installation
- Navigate to wp-content folder and then to the themes folder.
- Upload our theme folder with the FTP client to Themes folder inside wp-content folder
- Log-in to WordPress dashboard & now activate the theme.
2.3 RECOMMENDED ACTIONS
Once you’ve Viable Blog, theme installed and activated, a message will pop up to install “Everest Toolkit”. Install this plugin and activate it. Now, go to Dashboard > Appearance > Viable Blog Info and install all the plugins recommended by us. You will also find short links for customization and support. For importing the demo contents, please go to
NOTE: FOR EXISTING WORDPRESS USERS :
After installing and activating the plugin “Everest Toolkit” which is recommended by us, you have to check whether your homepage setting is set to “Your latest posts” or not. If you are not sure then, you can go to Dashboard > Settings > Reading and click on “Your latest posts”. If they are set properly then there is nothing to worry about using our theme.
2.4 DEMO DATA IMPORT
FOR FRESH WORDPRESS USERS :
We suppose demo import is best for a freshly installed WordPress site. Delete Hello world! post from Dashboard > Posts & Sample page from Dashboard > Pages which comes by default to get the best and exact demo.
Lean back when we take care of everything. We have made demo import more convenient for you. Follow the steps below to import demo.
- Click on Dashboard > Appearance > Import Demo Content
- Click on Import Demo button of which you like most
- Once the import completes, you are good to go.
FOR EXISTING WORDPRESS USERS :
Before importing demo data. please be sure you have set your homepage settings to “Your latest posts”. If you are not sure then, please kindly follow instructions on
2.3 RECOMMENDED ACTIONS.
Lean back when we take care of everything. We have made demo import more convenient for you. Follow the steps below to import demo.
- Click on Dashboard > Appearance > Import Demo Content
- Click on Import Demo button of which you like most
- Once the import completes, you are good to go.
3. CUSTOMIZER OPTIONS
Viable Blog is crafted with handy important customization options powered by WordPress live customizer. You can find all the options under Dashboard > Customizer.
Font Option: You can switch between 800 ++ Google fonts according to your requirements. Advance typography option is available to customize it for different section. You can find it on Dashboard > Appearance > Customizer > Advance Fonts Options.
Colors: You can switch any primary color that best matches your brand or need. Along with it, advance color option is available to customize individual sections color. Dashboard > Appearance > Customizer > Advance Color Options.
Sidebars: We understand that some peoples may not like sidebars. To make your need hassle free we have added sidebar options you can have sidebar either in left, right or completely disable it.
Dashboard > Appearance > Customizer > Sidebars.
More : More basic options are available!
4. HEADER SECTION
You can basically tweak the header section with styles as per your need. You can do that in few clicks though WordPress Customizer.
Options for Header section are placed inside WordPress customizer which are sticky header, Header layout, Header style, Changing logo.
Sticky Header: Make logo & navigation portion sticky when scrolling
Custom logo: Make the sure the height of the logo is 250px. Your width of logo could be anything like 200px, 300px, 250px or something like that.
Header top & header top social icons: You can assign social icons at header top from when you choose different header layout.
4.1 HEADER TOP SECTION
For social links, options are inside Customizer > Social Links.
4.2 HEADER SECTION PRIMARY NAVIGATION & LOGO
Logo can be changed from Site identity option inside WordPress customizer. If you are adding a custom logo make sure the height of your logo is 250px.
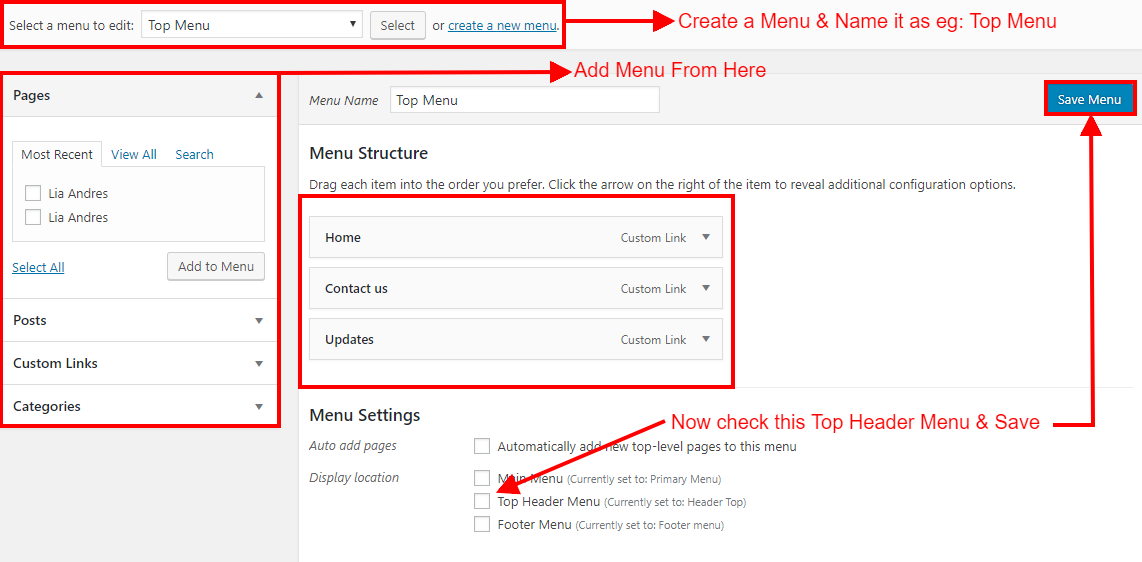
Primary Navigation can be added from WordPress dashboard > Appearance > Menu.
See the screenshot below.

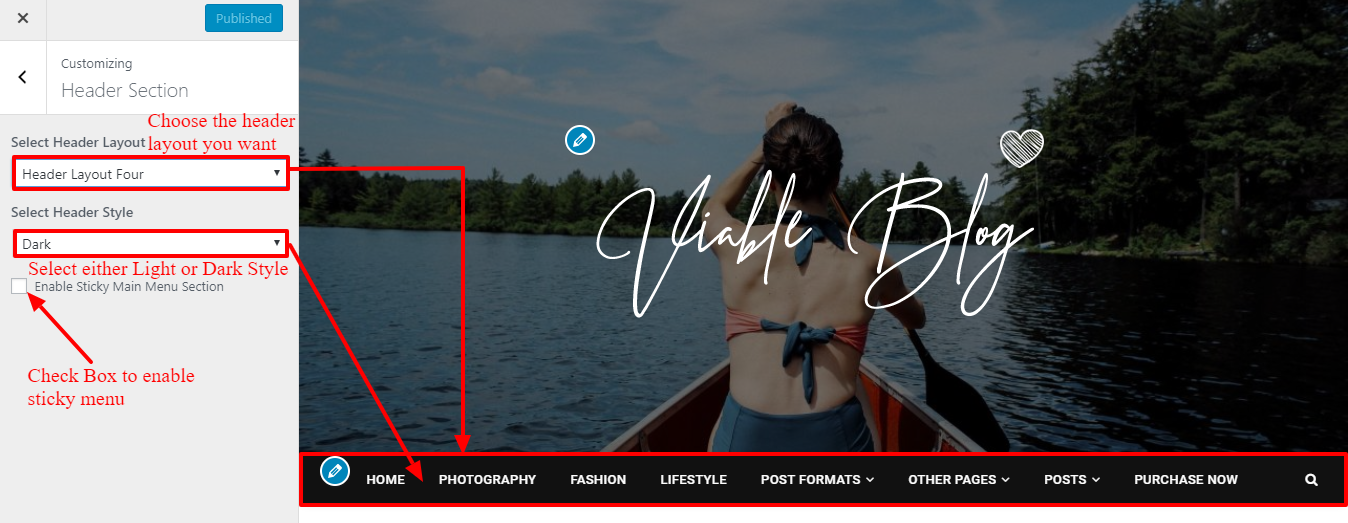
4.3 Header Layout
Viable Blog Pro has 4 types of Header layouts options where as Viable Blog Free has 2 Header layouts.
You can also select the header style to Light or Dark.
See the screenshot below.
5. BANNER SECTION
Viable Blog Pro comes with 4 types of banner layouts options whereas Free version has 2 types of banner layouts.
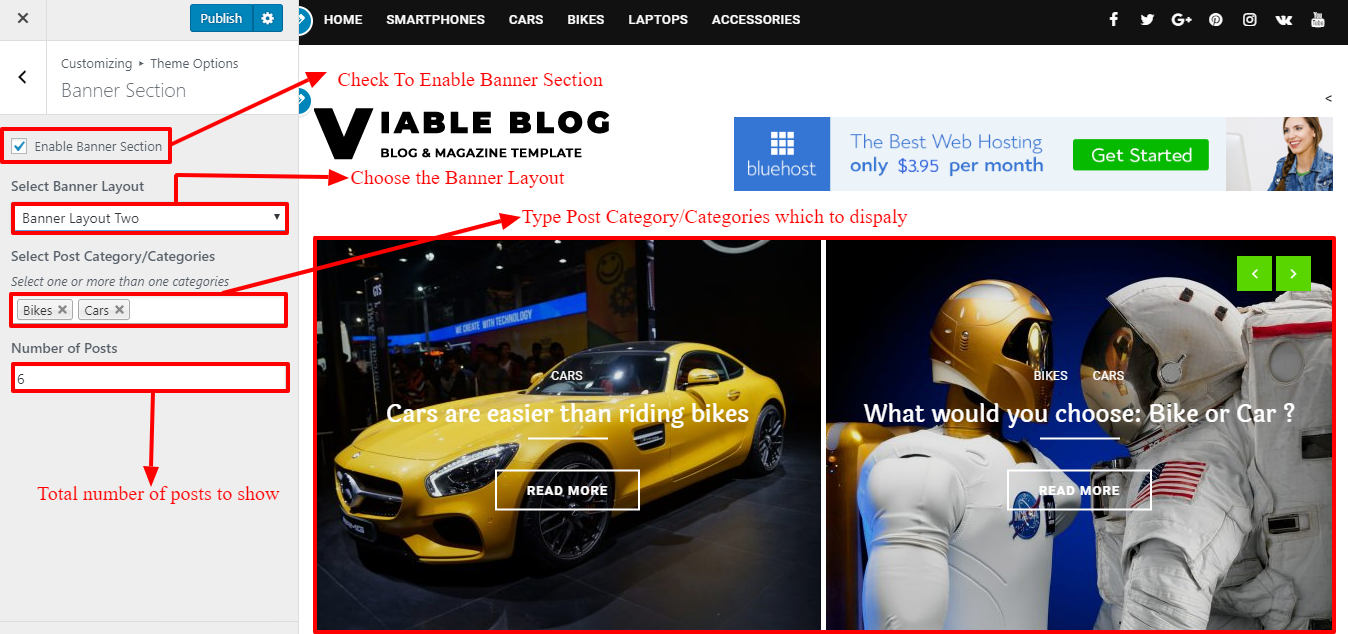
You can easily change the look and feel of the banner section in Viable Blog Theme though Customizer. Navigate to WordPress Dashboard > Appearance > Customizer > Banner Section.
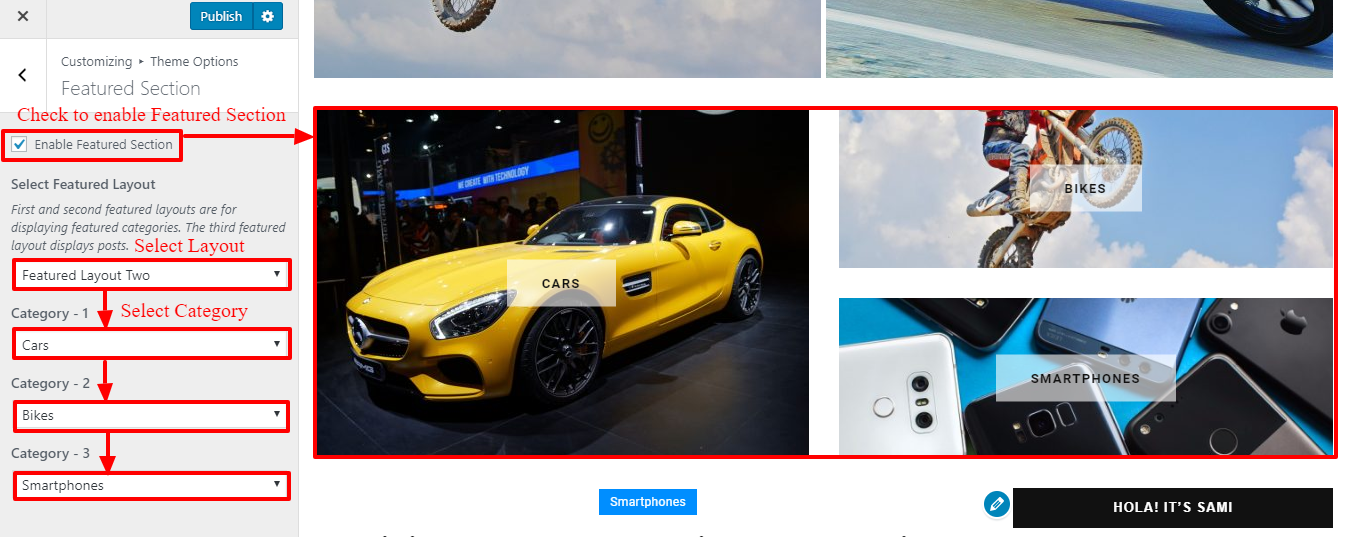
6. FEATURED SECTION
Viable Blog Pro theme has 4 types of featured layout options. First and second featured layouts are for displaying featured categories. The third featured layout displays posts.
You can customize Featured Section from WordPress Dashboard > Appearance > Customizer > Featured Section.
Note : It is available only on Pro version.
See the screenshot below:
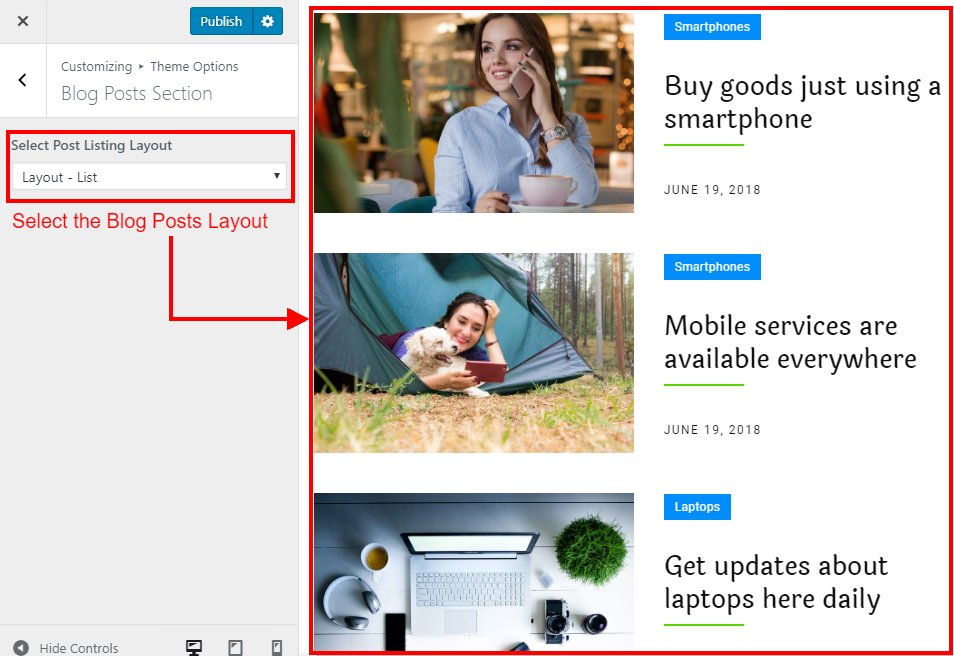
7. BLOG POSTS SECTION
Viable Blog Pro comes with 3 types of Post Listing Layout options where as only one layout is available on free which is indicated below :
- List (Pro)
- Grid (Both Free & Pro)
- Masonry (Pro)
You can customize Blog Post Section from WordPress Dashboard > Appearance > Customize > Blog Posts Section.
See the screenshot below:
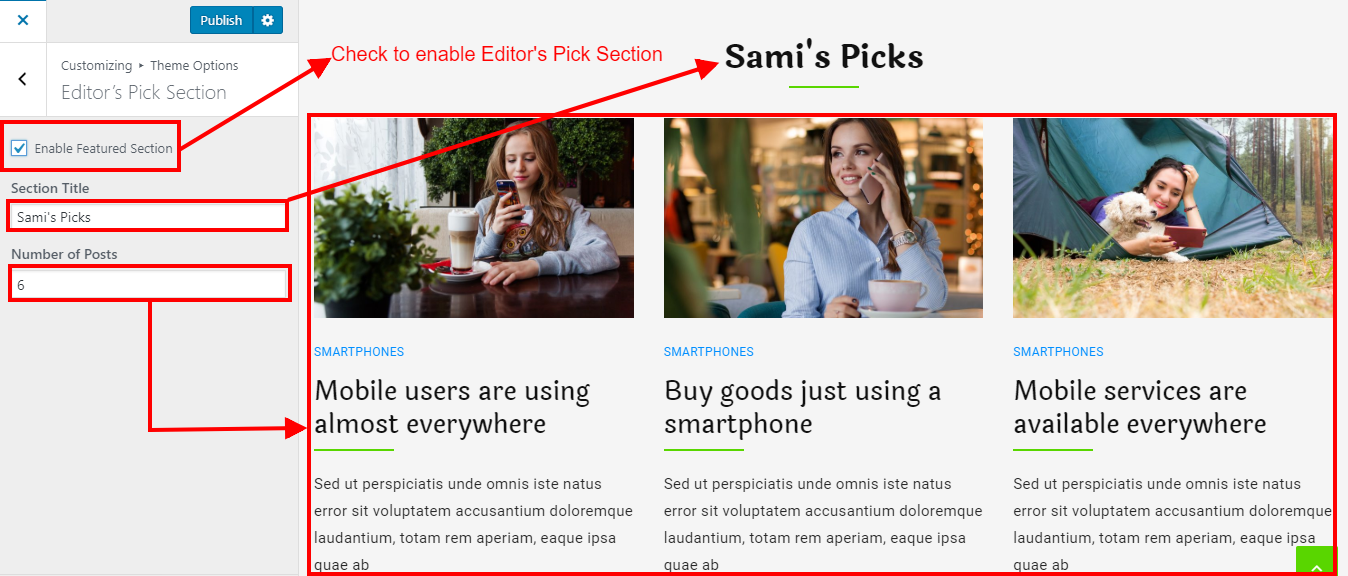
8. EDITOR’S PICK SECTION (PRO)
Viable Blog has the feature to show the specific post as Editor’s Pick Post.
To set Editor’s Pick Post, check on the box as shown in the screenshot.

After selecting specific post as Editor’s Pick, go to WordPress Dashboard > Appearance > Customizer > Editor’s Pick Section.
See the screenshot below:
9. ARCHIVE PAGE OPTIONS
You have to check to enable to customize the Archive Page Options.
You can customize it from WordPress Dashboard > Appearance > Customizer > Archive Page Options.
There are 3 options to choose the layout in Pro version :
- Grid (Both Pro & Free)
- List (Pro)
- Masonry (Pro)
10. PAGINATION & BREADCRUMB
Pagination and Breadcrumb can be shown in 3 different layouts in Pro version where as only one in Free version.
You can customize Pagination from WordPress Dashboard > Appearance > Customizer > Pagination and
Breadcrumb from WordPress Dashboard > Appearance > Customizer > Breadcrump.
11. RELATED POSTS
Related posts are displayed in the blog post page. You have to enable in order to customize the related posts section with different options from WordPress Dashboard > Appearance > Customizer > Related Posts.
You can edit the section Title and number of posts to show.
12. SOCIAL SHARE & OTHER OPTIONS
Attractive social share buttons can be enabled from the WordPress Dashboard > Appearance > Customizer > Social Share. Social share title, when set, is displayed in the blog post page. It is only available on Pro version.
In the Other Options, excerpt length words can be customized. Excerpt length sets the number of words that the excerpt can contain in archive or blog page.
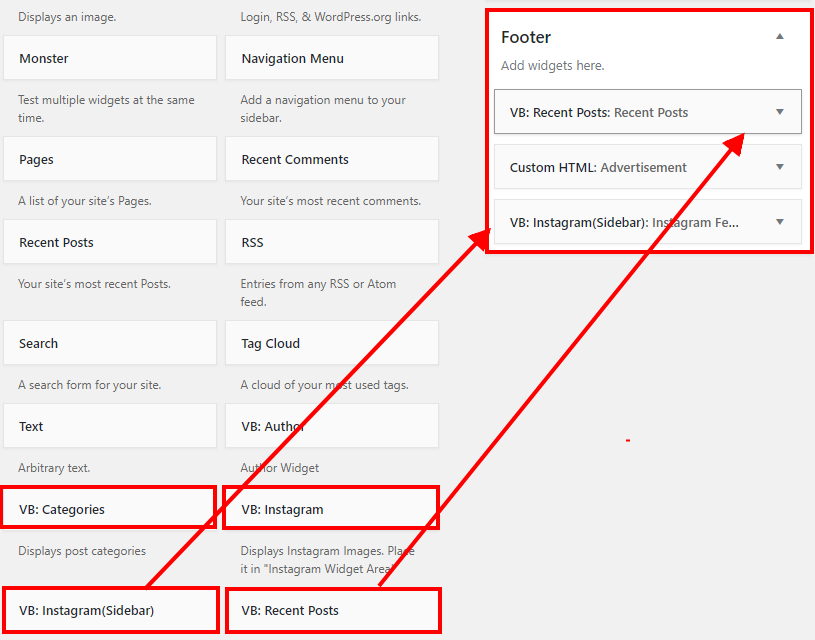
13. FOOTER SECTION
As Viable Blog is Blogging theme we do have special widget ready for Viable Blog. You can add a widget for footer from Dashboard > Appearance > Widget

Footer Text & Footer Social Links can be edited and enable from WordPress Dashboard > Appearance > Customizer > Footer Section.You can also select the footer style to either “Dark” or “Light” which is available on Pro version.
Footer Navigation Menu can be added from WordPress dashboard > Appearance > Menu.
13. SIDEBAR SECTION
Viable Blog has added sidebar options you can have sidebar either in left, right or completely disable it. Dashboard > Appearance > Customizer > Sidebars.

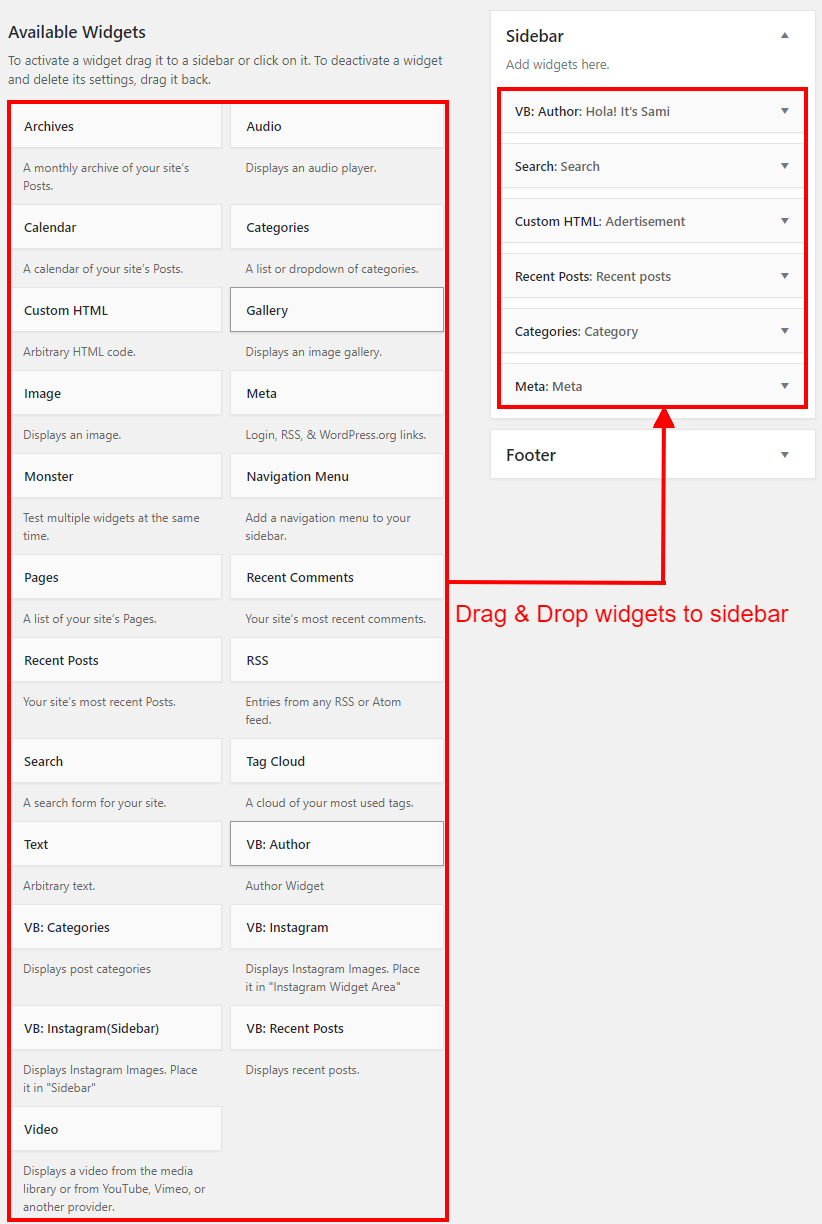
Go to Dashboard > Appearance > Widgets and insert the available widgets to the sidebar as shown in the screenshot.
14. WooCommerce
Go to Plugins> Add New> and Install Woo Commerce Plugins and get started with your Shop. This theme is tested and compatible with Woo Commerce.
Images Size Used In Theme
Here is the Image Size for Viable Blog
- Image Size for Grid/List Large Thumbnail 800 X 500 px
- Image Size for Grid/List Small Thumbnail 707 X 442 px
- Image Size for Grid/List Large Thumbnail 800 X 500 px
- Image Size for Author Thumbnail 800 X 600 px
- Image Size for Grid/List Large Thumbnail 800 X 500 px
- Slider Three Thumbnail( Fullwidth ) 1311 X 600
- Slider Four Thumbnail 500 X 700
- Widget Post Thumbnail 300 X 300 px
But If you maintain Image SIze 1311 X 600 then it will automatically crop images as of its size. Minimum your image size must be 1311 X 600 or 800 X 600 Px.