Do you want to start your blog with WordPress? If yes, you are in the right way.
If you are a blogger and love to write, then WordPress is the best platform for you. It is surprisingly simple to create a WordPress blog.
WordPress comes with amazing features that help you to customize your post easily. Today in this article, we are going to discuss how to add a new WordPress post, which is quite self-explanatory.
Here we will talk about overall features on the add new post screen and how you can utilize them to create better content. I am pretty sure by the end of the content; you will be able to create your post within your WordPress site.
Let’s get started:
Using Default Editor
WordPress has introduced a new block-based editor, “Gutenberg,” which is clean and easy to use. It provides a beautiful interface that includes several customizing features.
Here go through the following simple steps to create a WordPress post:
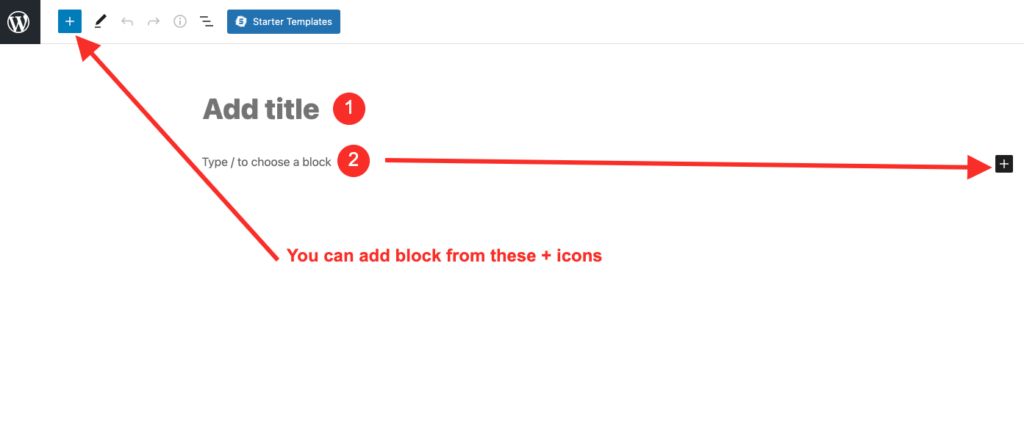
Step 1: Adding a Title and Content Blocks
Within the editor block, you will get an interface for your writing.
- Go at the top of the page and enter your post title.
- Move to screen, and add a block to write your content (You will get multiple options to select and add a block)
- Click on the search button or simply type “block “on a search bar.
- Start to write your content.
You will get several block options to add contents like paragraphs, columns, images, galleries, embeds, shortcodes, widgets, and more.
Step 2: Add Images, Videos, and Other Media
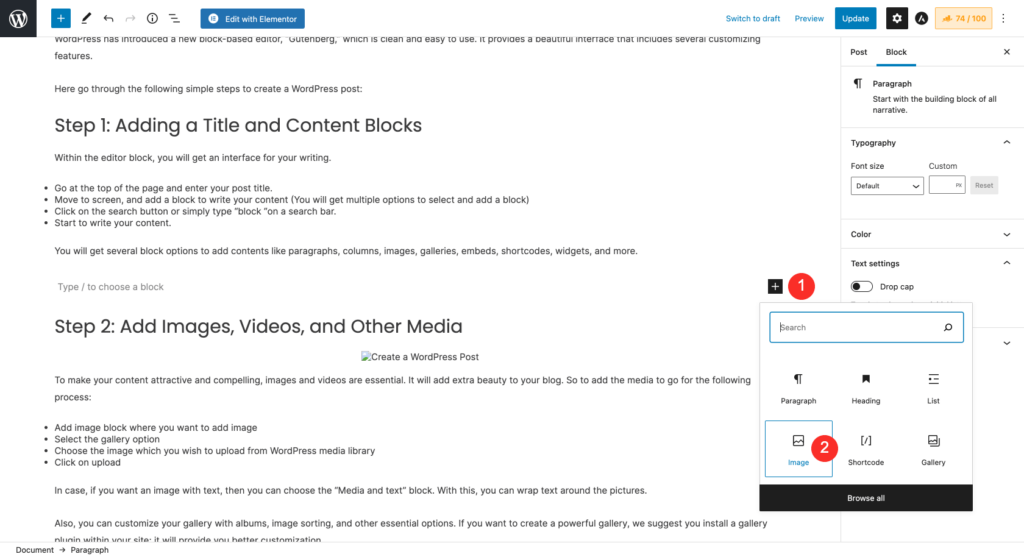
To make your content attractive and compelling, images and videos are essential. It will add extra beauty to your blog. So to add the media to go for the following process:
- Add image block where you want to add image
- Select the gallery option
- Choose the image which you wish to upload from WordPress media library
- Click on upload
In case, if you want an image with text, then you can choose the “Media and text” block. With this, you can wrap text around the pictures.
Also, you can customize your gallery with albums, image sorting, and other essential options. If you want to create a powerful gallery, we suggest you install a gallery plugin within your site; it will provide you with better customization.
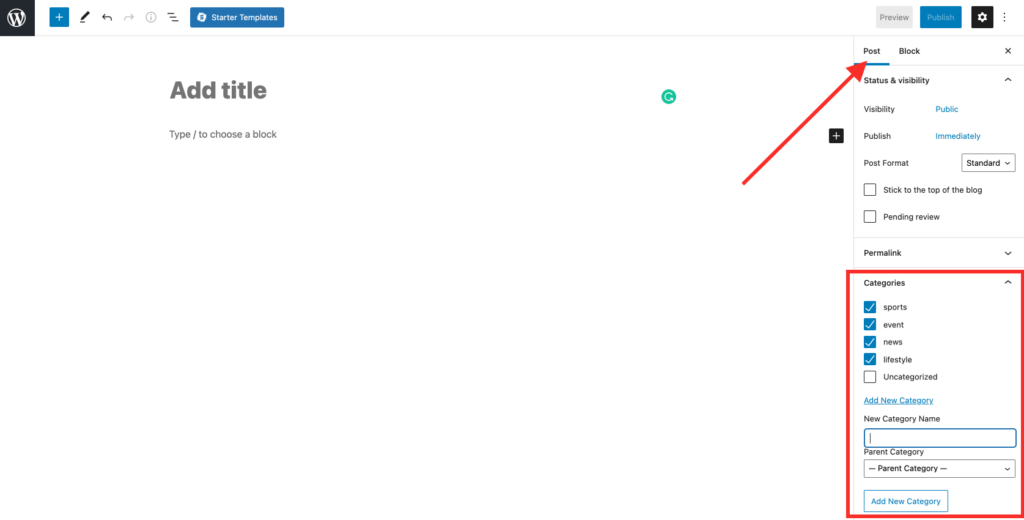
Step 3: Add Categories and Tags
Categories Box
In a typical blog, there are around 7-10 categories for content. WordPress allows you to sort your posts into different categories. Readers can browse specific categories to see all posts in the category.
To manage the categories follow the following steps:
- Go to Administration Panel
- Click on Posts
- Select Categories.
Tags Box
Tags are also called macro-categories for the post. It is helpful for SEO and helps the user to find the content they are looking for. Posts with similar tags are linked together when a user clicks one of the tags. So use the right tag code in your theme for them to appear in your post.
To add tags,
- Go to the Tag section.
- Write the required tags.
- Click on the “Add” button.
- OR, click on the “Choose from the most-used tags” link to see all of the tags used by the site.
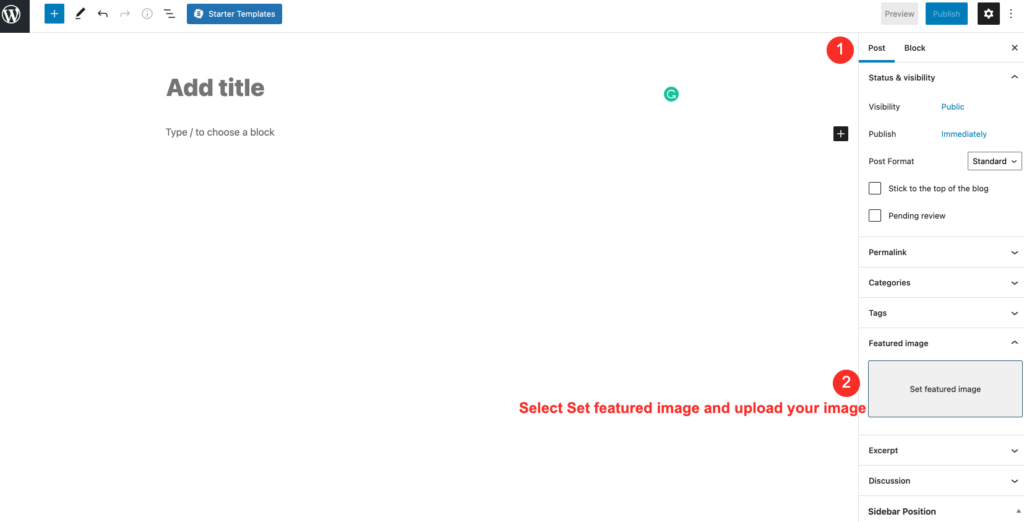
Step 4: Add Featured Image
Every post or blog required a featured image that reflects its feature. It tells what the post is about. This is the main article image that represents the content. Such images are mainly displayed on your website on single posts, blog archive pages, as well as on the homepage of news, magazine, and blog websites.
Whichever theme you are using, you will get an option for a featured image. To add the featured image in your blog or post, go for the following process:
- Go to the document setting under the right column.
- Click on the “Set featured image.”
- Select the image from your PC which you want to be used as the featured image
Note: Never confuse about featured images and cover images; both are different things.
Step 5: Adding Excerpts (Article Summary)
Excerpts mean a summary of the article. It appears on the front page of your site as well as on the category, archives, and search non-single post pages.
There is more chance, WordPress themes can automatically generate the Excerpt from the first few lines of your post. WordPress uses the first 55 words of your post for excerpts.
To add excerpts manually, you have to modify the template file listing the post to use the_excerpt() instead of the_content() to display the Excerpt.
Step 6: Changing Post URL Slug or Permalink
WordPress, by default, uses the title of your post as the permalink, which is SEO-friendly URLs for your blog posts. But you can change it to make it more SEO-friendly.
However, some users may want to change it to be more SEO and user-friendly. There are two ways to do that.
First process:
- Click on the post title.
- Go to an option to change the permalink above the title field.
- Add the permalink for your post.
- Second Process:
- Go to the document settings column.
- Click on Administration Panels
- Choose the Setting option.
- Apply the Permalinks
To form a permalink, Punctuation such as commas, quotes, apostrophes, and invalid URL characters are removed, and spaces are substituted with dashes to separate each word.
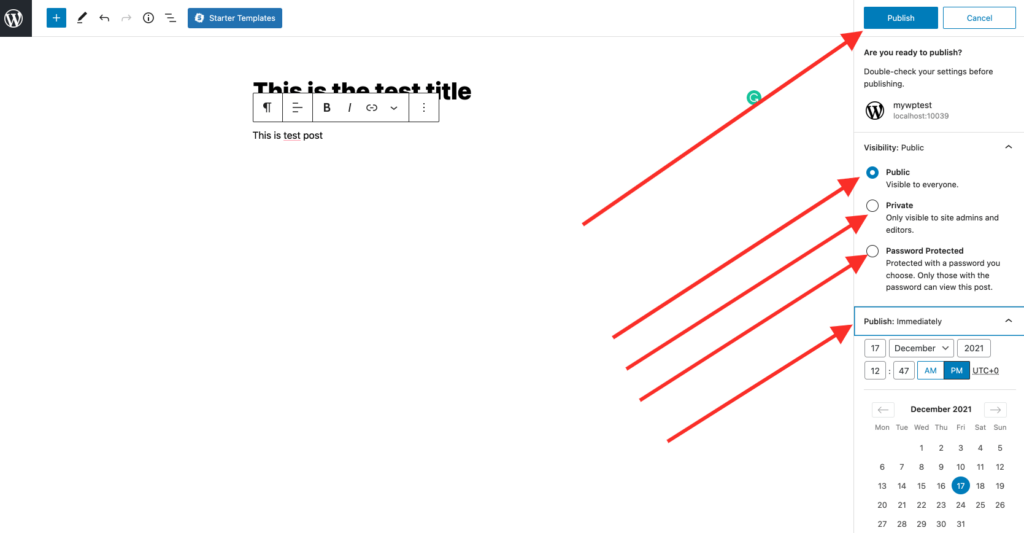
Step 7: Publish the Post
Up to now, you have completed your post, now it is ready to publish. Before publishing the post, sometimes, you need to save it on draft for further use. You can see the live preview of your post and customize it if anything seems wrong. All these options are available in the right column.
Preview Button: Allow you to see the online visual of your post without making it live.
Save Draft: This allows you to save your post as a draft rather than immediately publishing it.
Status: It shows the status of your post like a pending review, publishes, and others. You can see all posts organized by state by going to Administration Panels >> Posts >> Edit.
Visibility: It determines how your post appears to the world. Once you publish the job, it is visible to all website visitors. But if you make the post private, it will be visible only by yourself.
Revisions: Browse your post to see all of the changes you’ve made.
Scheduling: Suppose you completed your post but want to publish it later. In such a situation, you can schedule a post for publication by applying a future time and date.
Trash: If you want to delete your post, simply click on the “Move to trash” button. WordPress will send the post to the trash. All the deleted posts will remain in the trash folder for up to 30 days. After that, they will be deleted permanently.
Conclusion
Finally, we did with the overall description for creating a post within your WordPress. If you go through each step, I am pretty sure you can do it with easy access. To create a post, one need not be an expert; beginners can also start their WordPress post with basin knowledge.
With a proper strategy, you can make an excellent post for your WordPress website. To make your post more useful, you can implement other essential tools for SEO and content marketing. This will be helpful for the growth of your blog.
Hopefully, you get this WordPress tutorial helpful to you. Feel free to send your queries in our comment section. We will get back to you with your answer as soon as possible. Keep visiting our site for more helpful WordPress tutorials.